先日、WordPressで、
・カスタム投稿を追加
・カスタム投稿に任意のカスタムフィールドを追加
・カスタム投稿には詳細ページがある
・カスタム投稿にはタクソノミーでの一覧ページがある
・カスタム投稿の指定の記事のみトップページに表示
を実装する案件がありました。
上記のような仕様は結構多くあるので、
この際、プラグインを使用せず、function.phpにそのまま突っ込んでいった方が、
今後の案件などの時に、いちいちプラグインを入れず、コピペで出来るので、
その方が早く出来そうなので、この際内容をまとめて公開してみます。
今回の例では
・「取扱商品」というカスタム投稿を作成し
・「取扱商品」には「価格」と「容量」という
・「https://sample.com/item/」というURLをカスタム投稿のトップページにする
場合として公開するので、必要に応じてご変更ください。
では行きましょう~
カスタム投稿を追加
これは簡単ですね。
functions.phpに下記を記載します。
|
1 2 3 4 5 6 7 8 9 10 11 12 13 14 15 16 17 |
// カスタム投稿を追加 add_action( 'init', 'custum_post_type' ); function custum_post_type() { register_post_type( 'item', array('labels' => array( 'name' => __( '取扱商品' ), 'singular_name' => __( '取扱商品' ) ), 'public' => true, 'menu_position' => 5, //管理画面の左メニュー何番目に表示させるか 'hierarchicla' => true, 'supports' => array('title','editor','thumbnail', ) ) ); } |
こんな感じです。supportsの部分は、必要に応じて追加、変更してください。
カスタムフィールドの設定
ここでは、
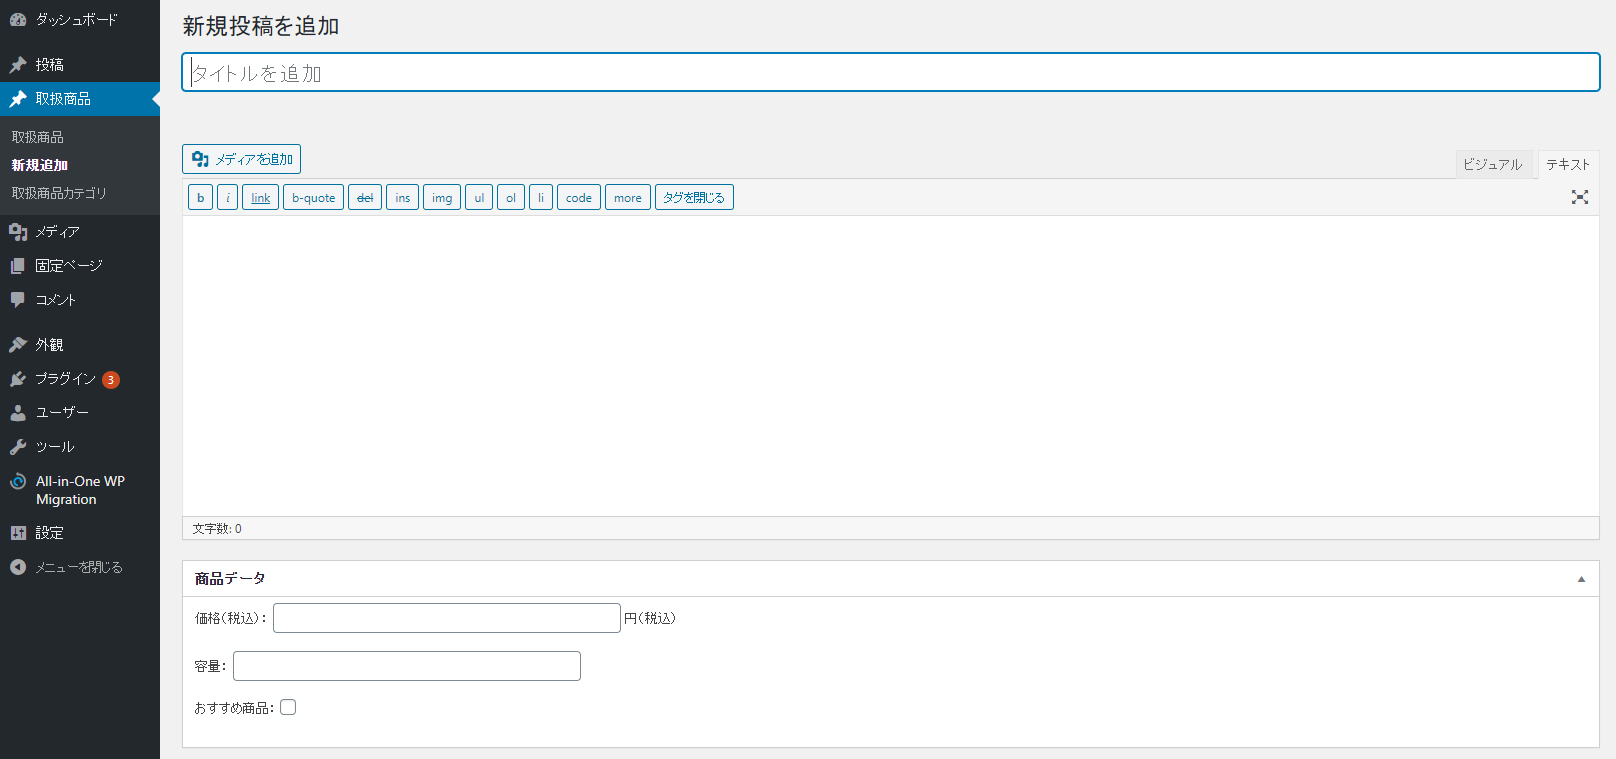
「価格」と「容量」の入力欄と
任意の記事を表示させるためのチェックボックス「おすすめ商品」を
「商品データ」というカスタムフィールドボックスで作成します。
またまた、functions.phpに
|
1 2 3 4 5 6 7 8 9 10 11 12 13 14 15 16 17 18 19 20 21 22 23 24 25 26 27 28 29 30 31 32 33 34 35 36 37 38 39 40 41 |
// カスタムフィールドボックスを作成 function add_item_fields() { add_meta_box( 'item_setting', '商品データ', 'insert_item_fields', 'item', 'normal'); } add_action('admin_menu', 'add_item_fields'); // カスタムフィールドの入力エリアを設定 function insert_item_fields() { global $post; echo '価格(税込): <input type="text" name="item_price" value="'.get_post_meta($post->ID, 'item_price', true).'" size="50" /> 円(税込)<br><br>'; echo '容量: <input type="text" name="item_volume" value="'.get_post_meta($post->ID, 'item_volume', true).'" size="50" /> <br><br>'; if( get_post_meta($post->ID,'item_label',true) == "is-on" ) { $item_label_check = "checked"; } echo 'おすすめ商品: <input type="checkbox" name="item_label" value="is-on" '.$item_label_check.' ><br><br>'; } // カスタムフィールドの値を保存させる function save_item_fields( $post_id ) { if(!empty($_POST['item_price'])){ update_post_meta($post_id, 'item_price', $_POST['item_price'] ); }else{ delete_post_meta($post_id, 'item_price'); } if(!empty($_POST['item_volume'])){ update_post_meta($post_id, 'item_volume', $_POST['item_volume'] ); }else{ delete_post_meta($post_id, 'item_volume'); } if(!empty($_POST['item_label'])){ update_post_meta($post_id, 'item_label', $_POST['item_label'] ); }else{ delete_post_meta($post_id, 'item_label'); } } add_action('save_post', 'save_item_fields'); |
こんな感じで記載します。
ここまで入れると、「取扱商品」というカスタム投稿が表示され、
記事作成欄にカスタムフィールドが出ているはずです。

こんな感じ。
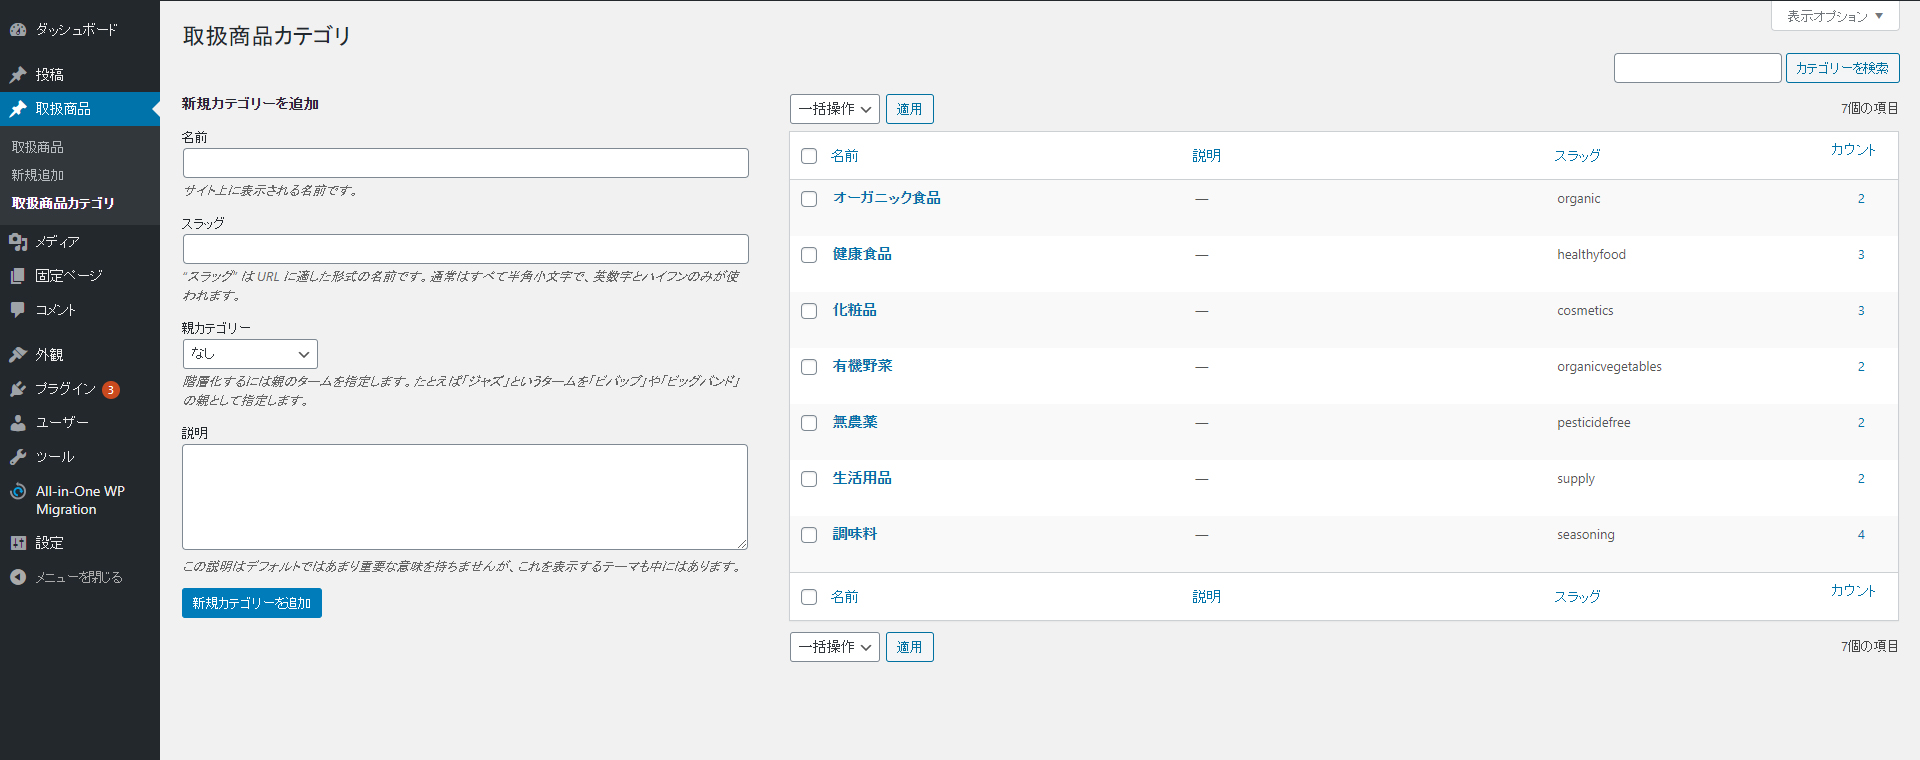
続いて、「取扱商品」のタクソノミーを作成します。
function.phpに下記を追加
|
1 2 3 4 5 6 7 8 9 10 11 12 13 14 15 16 17 18 19 20 21 22 23 24 |
function custom_item_taxonomies() { $labels = array( "name" => _x( "取扱商品カテゴリ", "taxonomy general name" ), "singular_name" => _x( "取扱商品カテゴリ", "taxonomy singular name" ), ); $args = array( "labels" => $labels, "public" => true, "hierarchical" => true, "show_ui" => true, "show_in_menu" => true, "show_in_nav_menus" => true, "query_var" => true, "rewrite" => array( 'slug' => 'item_cat', 'with_front' => false, ), "show_admin_column" => false, "show_in_rest" => false, "rest_base" => "", "show_in_quick_edit" => false, ); register_taxonomy( "item_cat", array( "item" ), $args ); } add_action( 'init', 'custom_item_taxonomies' ); |
ここまで行くと、「取扱商品」に「取扱商品カテゴリ」が表示されてるはずです。

入力側は、これで完了です。
試しに、何記事が入力しておくと良いと思います。
続いて出力側です。
出力側では
・archive-item.phpの作成
・taxonomy.phpの作成
・single-item.phpの作成
・home.php(front-page.php / index.phpなどトップのテンプレート)に「おすすめ商品」を表示させる記述
を行います。
archive-item.phpの作成
|
1 2 3 4 5 6 7 8 9 10 11 12 13 14 15 16 17 18 19 20 21 22 23 24 25 26 27 28 29 30 31 32 33 34 35 36 37 38 39 40 41 42 43 44 45 |
<ul> <?php if (have_posts()) : // WordPress ループ while (have_posts()) : the_post(); // 繰り返し処理開始 ?> <li><a href="<?php the_permalink(); ?>"> <?php if (has_post_thumbnail() ) { echo get_the_post_thumbnail($post->ID, 'thumbnail'); } else { echo '<img src="' . get_bloginfo( 'template_directory' ) . '/noimage.gif">'; } ?> </a> <h3><?php echo get_the_title(); ?></h3> <p> <?php if(post_custom('item_price')): ?><?php echo get_post_meta($post->ID, 'item_price', true); ?>円(税込)<?php endif ; ?> <?php if(post_custom('item_volume')): ?><?php echo get_post_meta($post->ID, 'item_volume', true); ?><?php endif ; ?> </p> </li> <?php endwhile; // 繰り返し処理終了 else : // ここから記事が見つからなかった場合の処理 ?> <div class="post"> <h2>商品はありません</h2> <p>お探しの商品は見つかりませんでした。</p> </div> <?php endif; ?> </ul> <!-- pager --> <?php if ( $wp_query -> max_num_pages > 1 ) : ?> <div class="navigation"> <div class="alignleft"><?php next_posts_link('« PREV'); ?></div> <div class="alignright"><?php previous_posts_link('NEXT »'); ?></div> </div> <?php endif; ?> <!-- /pager --> |
こんな感じですねー。
続いてtaxonomy.phpです
|
1 2 3 4 5 6 7 8 9 10 11 12 13 14 15 16 17 18 19 20 21 22 23 24 25 26 27 28 29 30 31 32 33 34 35 36 37 38 39 40 41 42 43 44 45 46 47 48 |
<ul> <?php if (have_posts()) : // WordPress ループ while (have_posts()) : the_post(); // 繰り返し処理開始 ?> <li><a href="<?php the_permalink(); ?>"> <?php if (has_post_thumbnail() ) { echo get_the_post_thumbnail($post->ID, 'thumbnail'); } else { echo '<img src="' . get_bloginfo( 'template_directory' ) . '/noimage.gif">'; } ?> </a> <h3><?php echo get_the_title(); ?></h3> <p> <?php if(post_custom('item_price')): ?><?php echo get_post_meta($post->ID, 'item_price', true); ?>円(税込)<?php endif ; ?> <?php if(post_custom('item_volume')): ?><?php echo get_post_meta($post->ID, 'item_volume', true); ?><?php endif ; ?> </p> </li> <?php endwhile; // 繰り返し処理終了 else : // ここから記事が見つからなかった場合の処理 ?> <div class="post"> <h2>商品はありません</h2> <p>お探しの商品は見つかりませんでした。</p> </div> <?php endif; ?> </ul> <!-- pager --> <?php if ( $wp_query -> max_num_pages > 1 ) : ?> <div class="navigation"> <div class="alignleft"><?php next_posts_link('« PREV'); ?></div> <div class="alignright"><?php previous_posts_link('NEXT »'); ?></div> </div> <?php endif; ?> <!-- /pager --> |
一緒ですね笑!
single-item.phpは、カスタムフィールを表示させるための記述が必要ですね。
|
1 2 3 4 5 6 7 8 9 10 11 12 13 14 15 16 17 18 19 20 21 22 23 24 25 26 27 28 29 30 31 32 33 |
<div id="item_image"> <?php if (has_post_thumbnail() ) { $thumbnail_id = get_post_thumbnail_id(); $eye_img = wp_get_attachment_image_src( $thumbnail_id , 'large' ); echo '<img src=" '.$eye_img[0].' " >'; } else { echo '<img src="/noimage.gif">'; } ?> </div> <div id="item_content"> <h3><?php echo get_the_title(); ?></h3> <?php if(post_custom('item_price')): ?> <p><?php echo get_post_meta($post->ID, 'item_price', true); ?> 円(税込)</p> <?php endif ; ?> <?php if(post_custom('item_volume')): ?> <p>容量:<?php echo get_post_meta($post->ID, 'item_volume', true); ?></p> <?php endif ; ?> </div> </div><!--clearfix--> <div id="item_message"> <?php the_content(); ?> </div> |
こんな感じでいかがでしょうか?
最後は、トップページに「おすすめ商品」がチェックされた記事のみ表示させます!
|
1 2 3 4 5 6 7 8 9 10 11 12 13 14 15 16 17 18 19 20 21 22 23 24 25 26 27 28 29 30 31 32 33 34 35 36 |
<?php $args = array( 'post_type' => 'item', 'posts_per_page' => 6, 'meta_query' => array( array( 'key' => 'item_label', 'value' => 'is-on', 'compare'=>'LIKE' ), ), ); ?> <?php query_posts( $args ); ?> <?php if (have_posts()) : ?> <ul class="clearfix"> <?php while (have_posts()) : the_post(); ?> <li> <a href="<?php the_permalink(); ?>"> <?php if (has_post_thumbnail() ) { echo get_the_post_thumbnail($post->ID, 'thumbnail300'); } else { echo '<img src="http://ai101id2oo.smartrelease.jp/wp-content/themes/JAMTPL/cmn/images/noimage300.gif" alt="'.esc_html(get_the_title($post->ID)).'">'; } ?> <h3><?php echo get_the_title(); ?></h3> </a> </li> <?php endwhile; ?> </ul> <?php endif; ?> <?php wp_reset_postdata(); ?> |
・・・
最後が一番大切なのですが、
「必ずパーマリンク設定の変更を保存」を行ってください!!
そうしないと、ページが表示されませんよ!!!
これで完成です。
いかがでしたでしょうか。
結構汎用性が高いので、いちいちプラグインを入れるよりも、
直接入力した方が早いと思います。
それでは。


